For a single lady I'm extremely picky about wedding paper. And there isn't much out there that I love which means there isn't much here at the shop. But when I saw the Anna Griffin winter line last fall I knew I had to have it....for Christmas and for wedding. It comes in two tones, silver and gold and either collection is perfect for your special occasion.

Here's a single page spread I created during the 4 day crop.

I started by layering lots and lots of patterns and textures. First the base paper then another layer on the diagonal. Then a pearl lining border. The photo mats are double matted with a 3rd print, a solid and photo corners. To give them extra dimension they are popped up with foam tape.

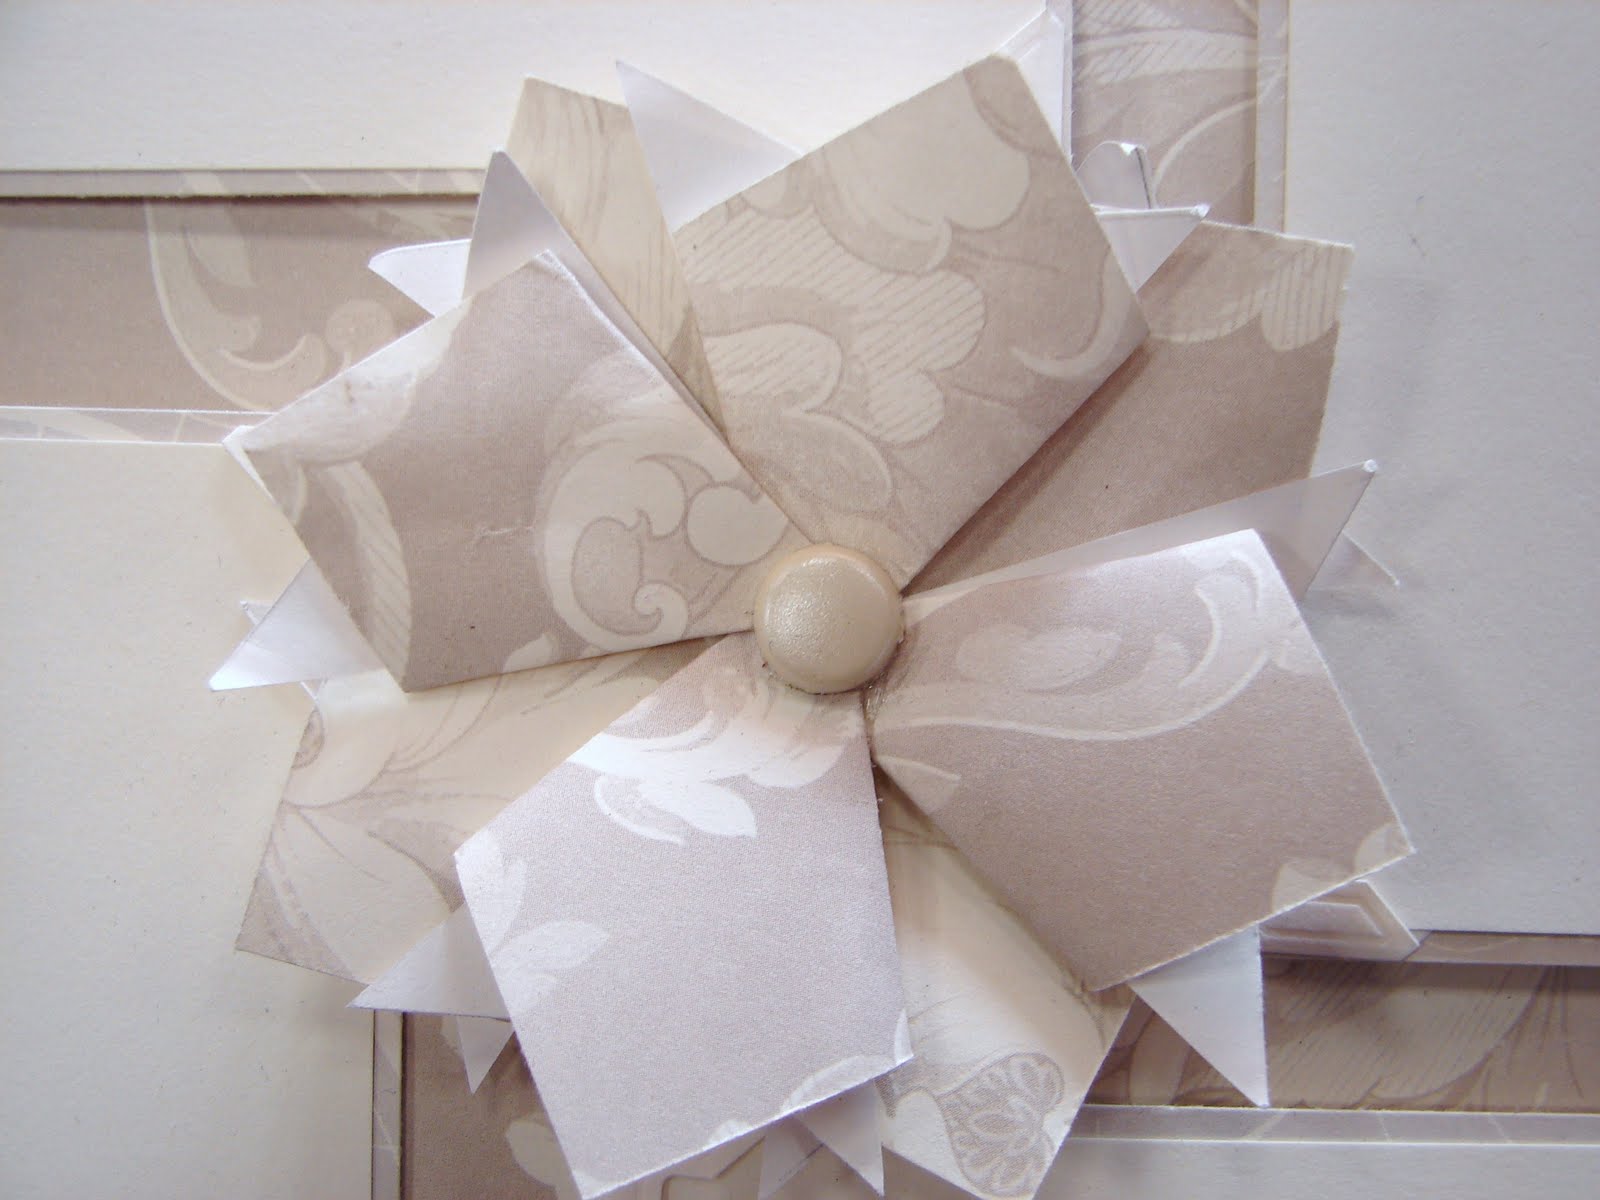
The layout still needed a focal point so I started playing with the triangles of paper cut from my 2nd layer. It resulted in a flower...I have step by step instructions below. The center is a Bling Brad from Bazzill.

*****
So here's how to make the flower...

1. Start with a triangle...
(I cut my 4 triangles in half for a total of 8 to make the flower)

2. Fold one side of the triangle up at the center point

3. Fold the other side of the triangle up at the center point.

4. Flip and fluff. Use your finger to open the center area up to give it extra dimension. Repeat for all 8 piece and layer for a flower!
*****
If you haven't seen the winter layout yet, here it is again!

I combined 4 prints from both the gold and silver collections, plus mats from the Creative Imagination's Real Wood Collection.

I added dimension with popped up die cut and tinsel from Melissa Frances.

Enjoy, Enjoy!
Sonja


