Wednesday, February 9, 2011

Local Love ...


Every once and a while I like to highlight The 350 Project because they are doing such a great job of raising awareness of the importance of supporting independents, like yours truly, because it just makes more sense economically.

But it also make sense emotionally...the Locals Love you more because it's true. I do what I do out of love. Love for scrapbooking, love for crafters and love for the friends I've made along the way. When the going gets tough...and believe me, it gets really tough, I hang in here because I do love you more!

So if you're looking for some local love this Valentine's day I have a couple goodies for you to consider.


Ribbon Cups make a terrific Valentine for your crafty friends. Each is unique and contains several yards of ribbon plus flower embellishments for just $5.


For a sweeter treat, consider our Candy Gram Tubes complete with candy and a mini handmade card. They're just $3 and you can't beat the ease. Or if you'd like to make your own, the empty tubes are just $1.


Last but certainly not least, we have gorgeous handmade Valentine Cards for sale for just $5.

And as always, we'll have our drop in Valentine Card workshop this weekend for just $5 so you can create your own Valentine, too!

Love ya,
Sonja

Saturday, February 5, 2011

February Layout of the Month Class

This year I want to get back to the basics and focus more on layouts...hence the last several posts. So I want to make sure there is a layout class for you each month. Classes are designed for anyone who wants to learn how to scrapbook or anyone who wants to try new tips and techniques...and everyone in between.

Here's this month's layout...featuring Scarlett from Glitz Design.
Click on the photo for a larger version!


We'll play with stamping, frames, glossy accents and even cover some Cricut basics. And you'll see how fun it is to scrapbook with smaller photos!


I'm offering this class twice:
Thursday, February 24th & Sunday, February 27th

It's drop-in style, anytime on those days, but please
do me a favor and let me know you're coming =)

The class fee is $20 and please bring your basic tool kit and own bottle of Glossy Accents or purchase it here at the shop. We'll be using lots of it!

This class really works better if you come with photos,
so please bring at least 6 photos print wallet size.


Off to work on March's layout!
Sonja

Friday, February 4, 2011

In Love with Lost & Found

The Lost & Found Collection from My Mind's Eye has inspired a lot of romance around here. The french inspired motifs and glitter accents are fantastic to work with. Here are four layouts to share!


There are lots and lots and lots of layers on this layout, which seems to be my favorite style right now. Here 2 papers are layered for a mat, plus a distress background rub on from Glitz Design. Imagine a photo or two on top of that shabby damask pattern. Next I accordion folded a border and added a rose ribbon border on top of that! The title is popped up on top of it all....simply perfect.


*****


I played with layering a bit different on this page...creating a bit of a shadowbox effect by taking the center out of the pink stripe paper and popped it up over the background paper. I double matted my photo mats and cut slits in the background paper to tuck pieces under elements like the bird cage, etc. The rose bouquet from ZVA is an easy way to add texture.


*****


I have to admit this one took me hours, but only because I kept trying tons of different ribbons until I found the exact right one. But that's all done for you so this layout will be easy as pie. Trim roughly 3" of the right side of the die cut paper and that will be the left part of your corset. After you add the eyelets for lasing, mount both pieces of the corset to the background page with foam mounting tape. Then lace your ribbon through. Take your left over ribbon pieces to make photo corners for your mats.


****


Cant' leave the boys out. This super cute cowboy motif is found in the "blue" collection of Lost & Found. I added a chipboard piece as one of the photo mats and layered ribbon under my paper layers for extra definition. Tanja had the brilliant idea to use silver photo corners to pick up the silver glitter accents! It all works!


Have fun creating!

Wednesday, February 2, 2011

Love in Bloom

Sometimes I wish inspiration wasn't so slow to come. Then I could have shared this fantastic idea with you a lot sooner. As it is, there is still time to come in and make this adorable "Love in Bloom" home decor piece and have it on display before Valentine's Day. The tree stands about 3 feet tall and your kit includes a bud vase. This is a perfect mommy & me project since it's super kid friendly!

Love in Bloom
Tuesday, February 8th; $25
Anytime, All Day
Please reserve your kit in advance!


And here's a look at some of the lovely papers used in this project from Best Creation! They're all in stock now, but won't be for long, so hurry in!


Sunday, January 30, 2011

Wedded Bliss

For a single lady I'm extremely picky about wedding paper. And there isn't much out there that I love which means there isn't much here at the shop. But when I saw the Anna Griffin winter line last fall I knew I had to have it....for Christmas and for wedding. It comes in two tones, silver and gold and either collection is perfect for your special occasion.


Here's a single page spread I created during the 4 day crop.


I started by layering lots and lots of patterns and textures. First the base paper then another layer on the diagonal. Then a pearl lining border. The photo mats are double matted with a 3rd print, a solid and photo corners. To give them extra dimension they are popped up with foam tape.

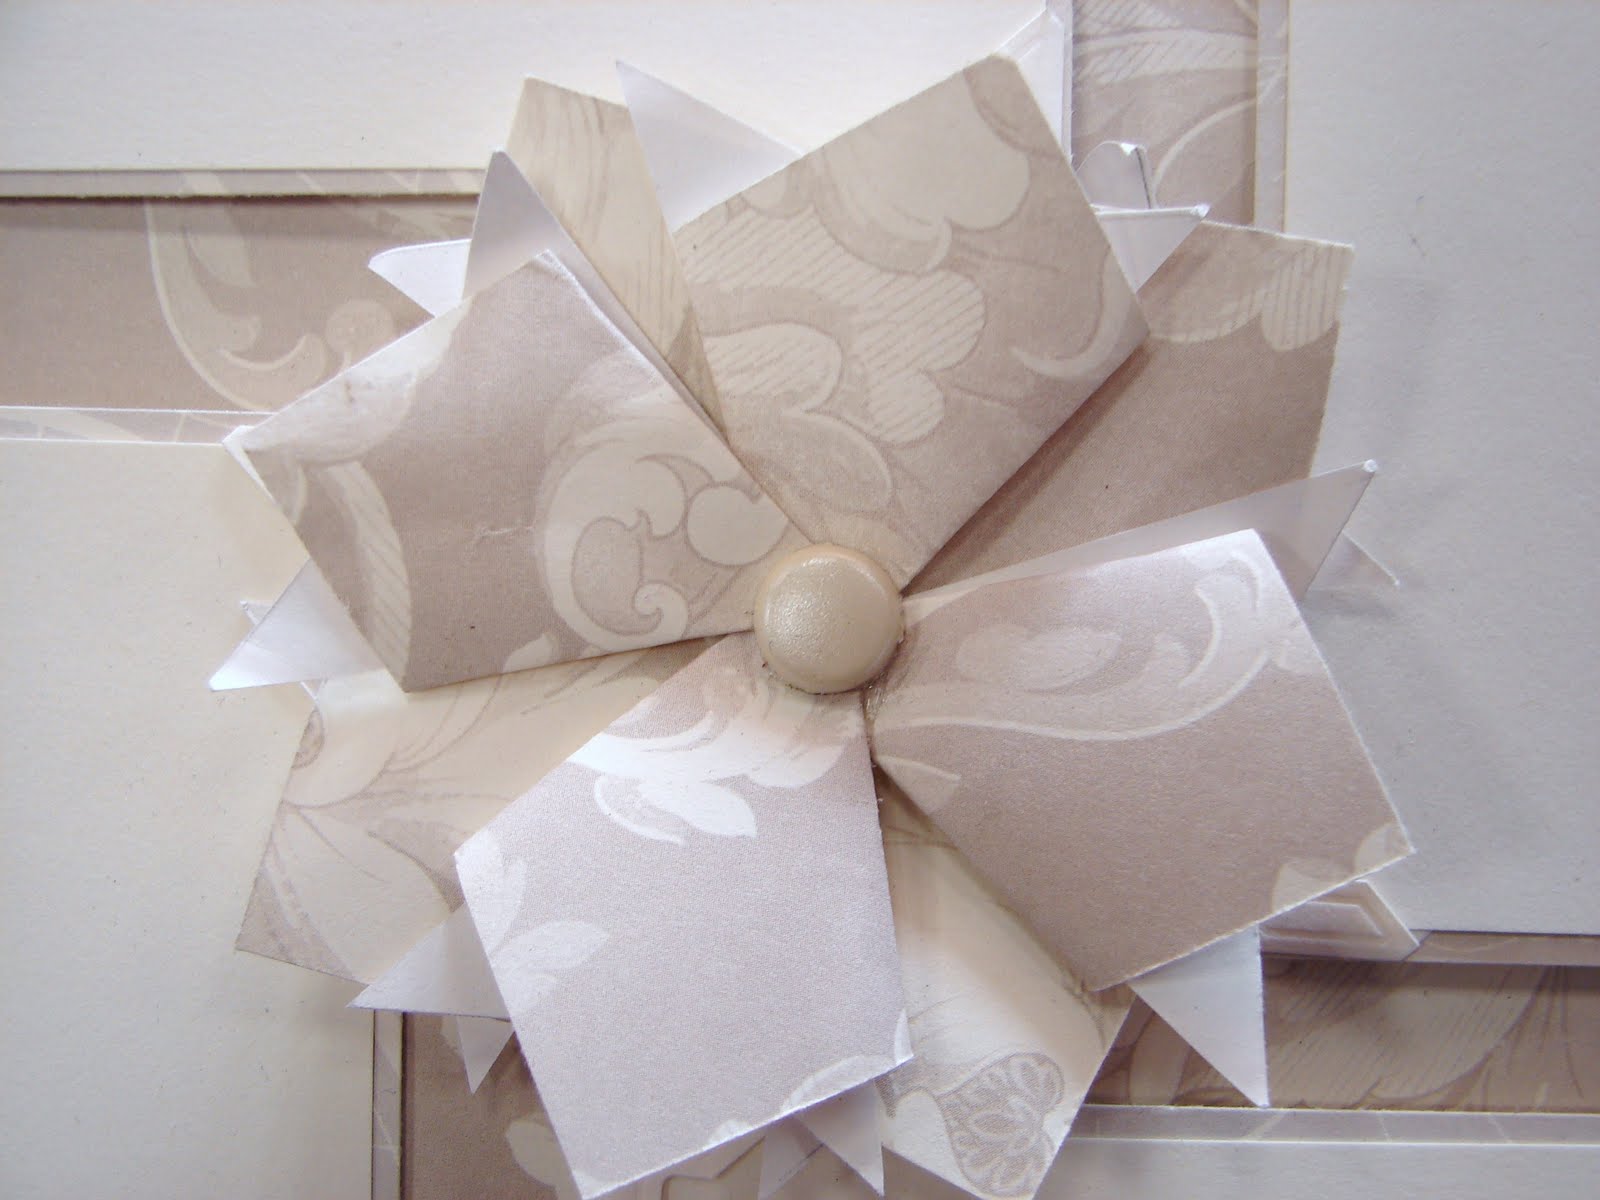
The layout still needed a focal point so I started playing with the triangles of paper cut from my 2nd layer. It resulted in a flower...I have step by step instructions below. The center is a Bling Brad from Bazzill.


*****

So here's how to make the flower...

1. Start with a triangle...
(I cut my 4 triangles in half for a total of 8 to make the flower)

2. Fold one side of the triangle up at the center point


3. Fold the other side of the triangle up at the center point.


4. Flip and fluff. Use your finger to open the center area up to give it extra dimension. Repeat for all 8 piece and layer for a flower!

*****

If you haven't seen the winter layout yet, here it is again!


I combined 4 prints from both the gold and silver collections, plus mats from the Creative Imagination's Real Wood Collection.


I added dimension with popped up die cut and tinsel from Melissa Frances.


Enjoy, Enjoy!
Sonja

Tuesday, January 25, 2011

More Layouts with Dear Lizzy

Here are more layouts from my marathon last week. These two feature papers from Dear Lizzy 2 from American Crafts. Aren't the colors fantastic for spring?


The pleated flower is accented with a vintage crystal button from Bazzill.

I also added a swatch of from a Hambly Transparency overlay and one of the super cute (but hard to know what to do with) pom poms from Glitz design.


The 2nd layout features overlapping strips that are 3" wide with rounded corners. I don't know what the rounded corners make such a difference, but it really does. I really wanted to feature the lace paper which is gorgeous but again, harder to know what to do with. Here's it's peaking out from under a layer, making it easier to adhere. I used a scrap of lace from Melissa Frances to finish the layout.


This design is easily transferable to a card, courtesy of Linda Tucker.


Ps....the background for both layouts with the white dotted swiss from Bazzill.

Happy crafting,
Sonja

Wednesday, January 19, 2011

No, I have not fallen off the face of the earth....

...I have just not been scrapbooking! There were of course the endless holiday preparations last month and a long and not fun to - do list greeting the new year. But during our 4 day crop....yes....Friday, Saturday, Sunday & Monday, I scrapped a dozen layouts to share with you. So here are the first few featuring the Alphabet Soup collection from My Mind's Eye.


This collection is so much fun and has a bright, kid-friendly color scheme. It also features a unique embellishment...playing cards. Here I sanded the cards and added them as an extra background layer on the layout. Aren't they cute?


For the "girl layout" I strung together several cards to form a banner accented by crystal embellishments from Melissa Frances.


And finally, there are some fun prints for Valentine's Day, like this argyle heart pattern. I red ribbon as an accent. Remember....colors don't have to be matchy matchy to be look good. They can be the same hue...just a stronger tone as in this layout. Colors should compliment, not clash. And I used the backside of the playing cards to add another heart element to the page. The weaving was super easy....just cut one inch strips and inch apart from one another.


Hope this inspires some creativity for you in the new year. I'll share more layouts soon!

Sonja